Friday, September 13, 2013

FROM DREAM HOUSE TO NIGHTMARE HOUSE
THE DIY HAUNTED DOLLHOUSE


What you need:
A dollhouse
Spray paint
Acrylic paint
Accessories 

Side note:  Here is the post that inspired me to do this project.  Just click
 right here.

So this is the dollhouse I started with.  It's a 1995 Barbie Dream House as discovered by a little research.  In mint condition they're worth a lot.  But since this was found at a thrift store for only $10, it definitely was not in mint condition.


The pillars on the front porch were broken and taped together, so I had to remove the tape and add some supports with hot glue.  I started out with some spray paint.  I used flat black.  Did you know that you can get cans of spray paint at Wal-Mart for only .96?  Yep, it's true.  And it might be cheap, but it works for a project like this.


This is after just one can of paint.  I ended up needing a second.  As you can see through the openings, the floors of the house fold up so that it can be closed.  I removed the floors altogether because they served no purpose for the end result.

I also created a little "yard" for my house.


After all the spray paint was dry and I was positive that I had put on enough coats of paint, I started working on the trim.  Also, it's probably best that you paint the inside of the house as well.  I used glossy paint on the inside for light reflection purposes.  I painted the roof and windows the same deep purple, and then did some of the accents in gray.


I didn't like the doorway on the top and bottom being open.  I bought some balsa wood and cut it with my xacto blade to make the doors and close up the openings.  I also added some lights to the inside.  You can get small strings of Halloween lights at Dollar Tree right now.  I used purple.  I'll post pics of it lit up after I add all the lights.  As you can see through the window, I added a fireplace.  I made the fireplace from the cabinet that had been in the house.  I ripped all the other furnishing out, except the fireplace.

So there ya go.  That's the basic stuff.  I bought dollhouse accessories from Hobby Lobby.  Except for the couch.  I happened to find that at the thrift store.  Dollhouse couches at Hobby Lobby were way too pricey.  The skeletons came from Dollar Tree.  They were black so I painted them white.  They need to show up well with the lights on...they kind of glow in the purple light.

(second floor, visible through the balcony doors)

(in the upstairs of the tower)


(open view from the back, top and bottom floors)

I added the skull to cover the "B" that was at the apex.


I added a cemetery and some trees to the yard.

The cemetery entrance was made from the headboard of an old Barbie bed.  Another thrift store find.

The grass for the yard is just floral moss that I got from the Dollar Tree.  Spray adhesive and sprinkle it on.


Completed project.

GOOD LUCK AND HAVE FUN!!!


Wednesday, July 17, 2013

CUPCAKE STAND


What you will need for this project:
3 pans in different sizes, or you could use burner covers but those only come in 2 sizes
Candle holders used for tapers
Hot Glue or E6000 glue
Spray Paint
Sharpie
Scrap Paper
Ruler/Yardstick
Spray Paint

I started out at a thrift store, as usual.  I got 3 pans and 2 candle holders and paid a whopping $4 for all of it.


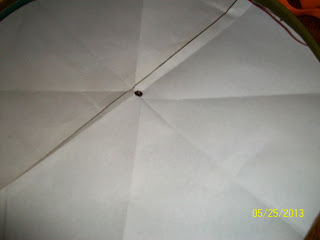
I started by locating the center of the bottom pan.  I did this by tracing the pan onto a sheet of paper.  After that, I used a ruler to mark 2 lines in the shape of an X.  This didn't work as well as I'd hoped, so instead, I folded the paper in half, than that in half and so on and so forth. 
After doing this, when you unfold it, all the creases will lead to the center showing you the exact center of the pan.  I used that to mark the center and hot glue the first candle holder in place.


I then did the same with the other 2 pans, making sure to get at the very center of each one.


Looking back, E6000 glue would have worked well too but I didn't have a tube on hand.

After this you, you simply spray paint the whole thing.


I added the little finial shown in the first picture as an after thought.  I had a spare curtain rod sitting around and it came off the end of it.  I did this for a gothic touch because as you can tell, that's my style.  Plus, I make most of this stuff for Halloween.


After this one turned out so well, I went a little nuts and started making them out of things I had around my house, such as a vase, sundae bowl, plates of assorted sizes, candle holders.


Warning: Unless you used food safe spray paint, I wouldn't put food directly on top of these things.  The cupcakes will obviously be in wrappers so that's safe.  The other plates are going have orange napkins placed on them first then have assorted cookies and other treats on them.

Good Luck and Have Fun!!


Tuesday, July 16, 2013

WITCH'S PENDANT


I started this project with a pendant found at a thrift store.  It was marked $6, but was on sale so I actually only paid $3 for it.

It looked like this for starters.


PS-I tried to discover what the words mean, but I couldn't get a clear answer online.  So who knows?

The first thing I did was spray paint it black.

Then it took me a minute to figure out what to do with it.  I tried glitter glue at first.

But I didn't really like it.  So I ended up hot gluing some gems to it.  Simple, yet effective.  The finished project is the first picture in this post.

So there it is folks, a simple project yet a fun one.  I also considered a spider for the center, or maybe and eye.  It all depends on what you desire.  Plus, this doesn't have to just be for a witch costume.  It could be for anything at all.  Most importantly, have fun with it!!


Tuesday, May 14, 2013

PILLAR CANDLES


What you will need:
Cardboard tubes (like toilet paper, wrapping paper, paper towel tubes)
Scrap cardboard
Newspaper
Glue/Water for paper mache
Hot glue
Acrylic paint
Electric tea light candles

First you'll want to start by tracing a circle using your tubes on the scrap cardboard.  Cut this piece out and slide it into the tube and secure in place with hot glue.  Make sure to use your tea lights as a guide as to how far the cardboard circle should go in because you want the flame part to be visible.


After you do this, take a piece of newspaper and measure it to fit the tube.  I only did one layer of paper per tube.  Make sure to make it long enough to fold over the top of the tube where the cardboard circle is secured.  Also, for good measure, I stuff the tube with newspaper to make it more sturdy.  


I paper mached the tube but I did it a little different than the usual technique.  I painted on a layer of the glue and water mixture, then wrapped the paper on the tube, then did another layer of the glue and water mixture on the outside.


After the paper dries, get out your hot glue gun.  Use it to make "wax" dripping down from the top of the candle.  Simply move it from the top down the tube and decide how far you want the drips to go down.  Do this all the way around the top of the tube, or not, up to you!


Sorry the hot glue is hard to see in the picture.  As you can tell, I made several of these.  After the hot glue hardens, just paint the whole thing and let it dry.  Bam, you're done!  It's ready to have the tea light turned on  and placed inside the top of the tube.


Now, I grouped these together and hot glued them to each other.  But you could easily attach these to a candle holder.  That's what I did with this next one.  I found the candle holder at a thrift store for a $1.


Have fun!  You can make as many or as few as you want.  They're so easy and cheap.  You can get creative and add glitter or glaze or whatever your heart desires.  And with them being electric, no risk of fire!  


Monday, May 13, 2013

POTION BOTTLES


What you will need:
Empty containers
Spray paint
Glue or Mod Podge
Tea dyed paper
Pen (for writing on the labels)

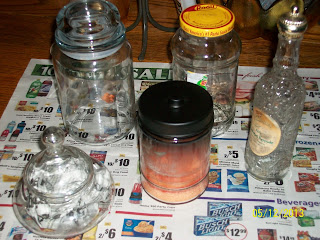
First, you'll need to gather an assortment of glass or plastic bottles/jars/containers.  I used all glass because I prefer the feel and durability of it as opposed to plastic.  A couple of these are jars I already had and a few are ones I found at a thrift store for $1 each.  


Next, grab your trusty spray paint.  This is the kind I used.  It bonds to metal, wood, wicker, glass, plastic etc...almost everything.  Plus, you only have to wait 1 minute between coats.  It dries in 10 minutes and is ok to handle within an hour.


Set up your drop cloth or trash bag or old shower curtain...whatever you want.  It's best to do your spray painting outside on a dry and hot day.  I did several thin coats of paint.  Make sure to cover every inch.


After I let these sit outside for about an hour or maybe two, can't exactly recall, I brought them inside and got ready to make the labels.


After tea dying the paper and letting it dry, I wrote out the labels and loosely cut them out.  I burned the edges for the hod podge random look.


Attach the labels to the containers with your mod podge or glue and just let them dry. 

That's all you have to do.  Get creative with your potion names!  Or, as I did mine, ingredients.  Side note: I glued the lids down using hot glue.  I didn't want mine to be able to open since they're empty.

Update: I made several more jars, including a couple apothecary jars.  For the bases I used an old door knob for one and a candle holder for the other.  Also, the large glass jar is just the way I bought it except I added a label to it saying "Poisoned Apples".  That was a thrift store find for just $4.


Sunday, May 12, 2013

WITCH'S SHOES


These fun and charming witch's shoes can be used as candy dishes with wrapped candy or as display items.  I'm going to use mine as part of a witch's station I'm setting up in October.

What you will need:
A pair (or a single) of heels
Hot glue
Masking tape
Aluminum foil
Scrap cardboard
Paint (your choice)
Newspaper strips
Glue/Water
Painter's Glaze or Mod Podge (optional)
Bobbles/Glitter/Decorating things

I started with a pair of heels I already owned and was positive I would never wear again.  They were wickedly uncomfortable!


I started out by forming some pieces of aluminum foil into curled points to make the toes of the shoes.  After doing this, I attached them with masking tape.


After doing this to both shoes, I wrapped the whole front end of the shoe in masking tape, making sure the cover all the way up the strap.


I then cut two small circles out of cardboard from an empty pasta box.  I hot glued them onto the heels of the shoes so I could widen them.


Then came the wrapping with foil for structure then wrapping them in masking tape to hold it on and give it some more support.


I stuffed the toes of the shoe with newspaper to give it some support and also to fill it in.  


I decided that my shoes looked too plain on the front, so I decided to add a little flare by giving my pair of shoes a pair of tongues.


Then it's time to paper mache.  Paper mache every single inch of the shoe.  Make sure to cover the inside as well and make sure to cover the opening.  This is how you make sure that the shoes' pasts are gone and covered up for good.


Once they dry (which will take several hours), it's pretty much whatever you want to do after that.  I glazed mine once the paper was dry for added durability but you can easily skip that step.  Just do whatever your heart desires.  Paint them pink or green or blue.  Just have fun!  I'm traditional so I painted mine black and covered them with green glitter glue.  


GOOD LUCK!